Golden Plains Greenhouse
  • Home
  • Contact
  • Blog

Quick Tips - Spring Pruning

5/2/2018

0 Comments

 
Quick Tips - Spring Pruning
Picture
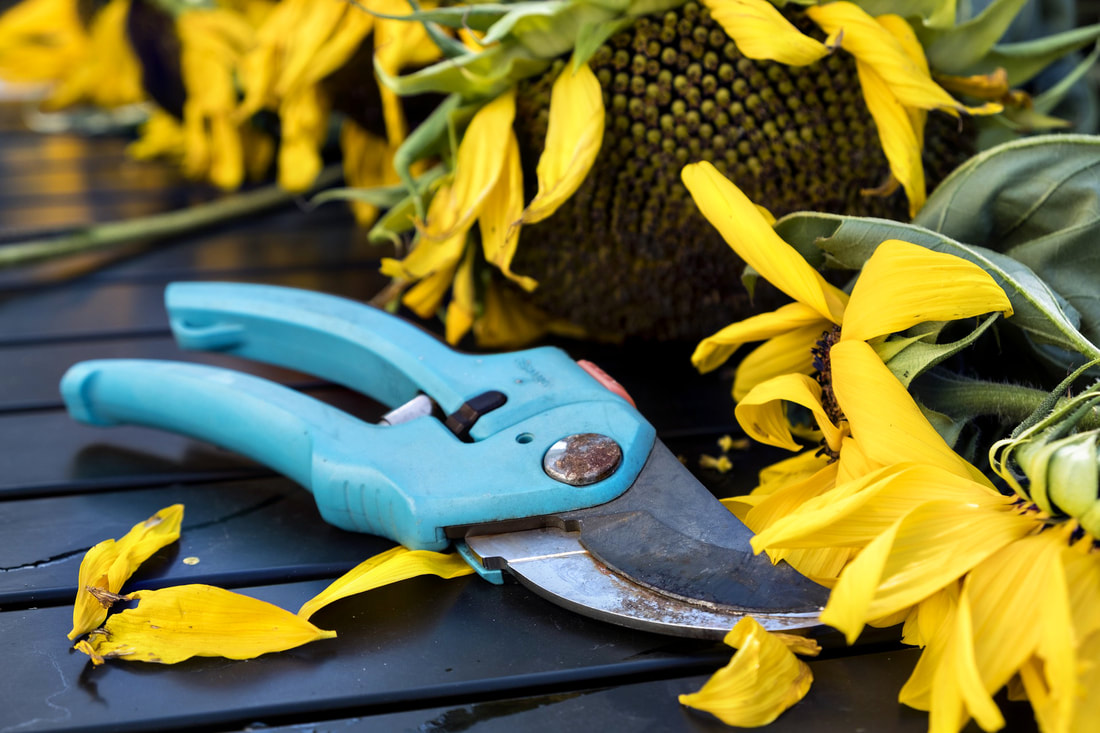
​The reason why we prune plants in the spring is to stimulate growth so want to be careful not to do it too early in case of an unexpected frost (like we don't have those here!). 

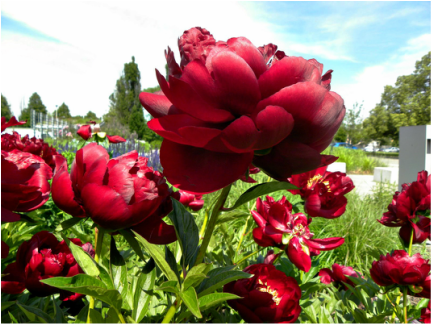
Summer blooming plants like Peonies and Echinacea should be pruned in spring after the risk of frost is gone. 

Spring blooming plants like Bleeding Hearts and Asters should be pruned only after they bloom so that you don't remove any future flowers.
0 Comments

Bloom of the Week: Galaxy Pink Sky Petunias

4/30/2018

0 Comments

 
Galaxy Pink Sky Petunia
Height: 10-16 in. • Width: 20-30 in. • Exposure: Full Sun
Bloom of the Week - Galaxy Pink Sky Petunias
Galaxy Petunias boldly go where no Petunia has gone before! 

Last year we introduced you to Night Sky, this year, say hello to Pink Sky! 

The white splashes on a background of deep pink creates an incredibly eye-catching contrast. Each bloom is uniquely patterned; no two are alike. 

The reason for this that the density and size of the white speckles vary depending on temperature, light and soil PH. Warmer weather brings out more of the pink background, whereas cooler weather will bring out more of the white splashes. To achieve the perfect balance of pink to white, it's best to have warm days and cool nights.
Galaxy Pink Sky Petunia
Pink Sky Petunias forms a mounded yet gently trailing plant that will look amazing in hanging baskets and containers, as well as make a great ground cover. Pair with it's sister, Night Sky for a gorgeous purple/pink combo or perhaps add some texture difference with a white Bacopa and a Sweet Potato Vine.

Remember to deadhead, meaning removing the dying flowers from the Petunia. Make sure to remove the base of the flower to include seed removal. Petunias allowed to go to seed will slow or stop blooming.

You may notice by midsummer, Pink Sky, like all Petunias, will begin to get a bit leggy and the stems will start to produce fewer blooms. Cut each stem back by half to rejuvenate the plant. After a short break, they will return to flowering. ​
0 Comments

Bloom of the Week: Black Satin Blackberry

5/30/2017

3 Comments

 
Bloom of the Week, Blackberry, Black Satin, Thornless
You know what I really love? Blackberries. They are awesome for fresh eating, amazing in jams and superb in pies! You know what I really hate? Blackberries. There is nothing worse than going to pick Blackberries and coming out with a scratched and bleeding arm. Those thorns are more than just annoying, they are dangerous! Okay, I may be exaggerating a bit with the word "dangerous", but I'm not kidding about the scratches, cuts and blood (it may be just a little blood though).

Well, if you would put yourself in the same boat as me (or should I say bush??), there is hope on the horizon for us. I would like to tell you about the Black Satin Blackberry, this beauty is thornless. That's right, I said thornless!
Bloom of the Week, Blackberry, Black Satin, Thornless
So now, when you think about it, you have no reason not to grow this wonderful berry. Seize the opportunity! 

Once seized, it's best to plant the Blackberry bush in a full sun location with good air circulation.

​The soil should be moisture retentive but well drained. Plant the rootball level with the soil surface with about 4-6 ft. of spacing.

One tip to keep in mind would be to avoid growing Blackberries where potatoes, grapes, tomatoes, raspberries, peppers, apples or peaches had once previously grown. These plants share similar diseases and pests with Blackberries.


For best growth, cut back immediately after planting to prevent the plant from setting fruit the first year.

This requires patience I know, but you will get much stronger growth and better harvests in years to come. A little waiting now will pay off in the years to come! Also, a little mulch with Blackberries would not be remiss!
Once you do let the fruit come in the second year, it will produce heavy crops (35-40 berries per stem) of large, golf ball sized berries. Smooth and glossy, the fruits are super-sweet with no sour bite. The berries are excellent for jams, jellies, pies and fresh eating, also they keep very well. Black Satin Blackberry bushes are self-pollinating, but are more productive when planted with another variety. 

So to recap, you can now have thornless Blackberries. It is now time to Carpe Diem! Or at least, Carpe some Blackberries!
3 Comments

Growing Flowers in the Veggie Garden

5/26/2017

2 Comments

 
Picture
You know, I've often wondered why people plant flowers in their veggie gardens. To my untrained eye, my only theory was that people wanted to make their gardens pretty. I thought it was weird, but you know, to each their own! Well, it turns out I was wrong (an uncommon occurrence, I can assure you!), and perhaps I can go so far to say I was only partially wrong. Flowers, regardless the reason they're put there, still make a veggie garden look prettier!

So the real reason is, drum roll please... companion planting! After I did some investigating, this turns out to be almost a science on it's own! Today I will only touch on the relationship between flowers and veggies, but I will be making another blog post (or maybe several) about this subject in the future that will expand past flowers.
Marigolds
Marigolds
  • French Marigolds can be used anywhere to deter Mexican bean beetles, squash bugs, thrips, tomato hornworms, and whiteflies. They are also known to repel harmful root knot nematodes (soil dwelling microscopic white worms) that attack Tomatoes, Potatoes, Roses, and Strawberries. The root of the Marigold produces a chemical that kills the nematodes as they enter the soil. If a whole area is infested, at the end of the season, turn the Marigolds under so the roots will decay in the soil. You can safely plant there again the following spring.
  • The strong aroma from the Marigolds tends to mask the smell of the vegetable plants, which can confuse garden pests.
  • For the best results, plants clumps of Marigolds throughout the garden to ensure the best coverage.
  • The one down side to including Marigolds in your garden is that they can attract spider mites, but these can be taken care of with a quick spray down with the hose.
Nasturtiums
Nasturtiums
  • Nasturtiums deters bean beetles, squash bugs, potato bugs, Cucumber beetles, whiteflies and the asparagus beetle.
  • The flowers of Nasturtiums, especially the yellow blooming varieties, act as a trap for aphids.
Picture
Lavender
  • Lavender is an excellent general pest repellent flower to use in your garden. It repels both fleas and moths, and it can help protect other plants near it from whiteflies. 
  • Lavender’s distinctive scent can work wonders for deterring aphids, so planting Lavender around Carrots and Leeks can confuse the little blighters and send them off!
  • Lavender can also handle some of the bigger garden pests, and has been noted to be useful in repelling both mice and rabbits. 
Petunias
Petunias
  • Petunias can repel asparagus beetles, leafhoppers, aphids, tomato hornworms, and others.
  • They also trap cabbage worms. These “worms” are in fact a species of caterpillar that will eat through an entire crop if left unchecked so the best, organic method for you to control these pests is to plant Petunias in your cabbage beds.
Sunflowers
Sunflowers
  • Sunflowers might be the largest flower you have in your garden and that is what will draw those beneficial pollinators over.
  • Then for that same reason, the Sunflower will also act as a distracting decoy for aphids. The aphids will attack the Sunflowers, but they do little damage because of the Sunflowers' thick stalks and overall toughness.
2 Comments

Bloom of the Week: Tuberosa Asclepias

5/23/2017

0 Comments

 
Asclepias, Butterfly Weed, Tuberosa
There is nothing quite so poetic as watching a butterfly flit from flower to flower on a warm summer's day in the garden. If this is a scene you want to help encourage, the best thing you can do is to plant nectar producing flowers to help attract these graceful fliers to your garden.

One of the most popular choices to help attract butterflies is Tuberosa Asclepias, also known as Butterfly Weed. Not only do they provide a source of nectar for them, but they also act as a host for the eggs of Monarch butterflies.
Asclepias, Tuberosa
Tuberosa Asclepias is a perennial, native to North America. It is a welcome addition to any border, butterfly or wildflower garden as it will bloom with brightly coloured, orange flowers from early to mid-summer all the way until fall. 
​

Growing Asclepais requires very little effort. The plant, suitable for growing in zones 3-9, thrives in bright sunlight and poor, dry, sandy or gravelly soil with a slightly acidic or neutral pH. Once established, Asclepais is drought tolerant and blooms dependably from year to year. Also, keep in mind that Asclepais  has long, sturdy roots that make transplantation very difficult, so locate the plant in its permanent place in the garden. 

Trim old growth every spring to keep them neat and healthy. No fertilizer is required, and may even harm the plant. Mealybugs and aphids may cause problems during the blooming season, but both are easily controlled by applications of insecticidal soap or horticultural oil.
If you are interested in producing more than just a feeding ground for butterflies, but a sanctuary where they can grow and multiply, there are other steps you can take to help create a butterfly haven.
  • Plant your butterfly garden in a sunny location (5-6 hours each day), but sheltered from the winds. Butterflies need the sun to warm themselves, but they won't want to feed in an area where they are constantly fighting the wind to stay on the plants. It is also a good idea to place a few flat stones in your sunny location so the butterflies can take a break while warming up.
  • Butterflies need water just like we do. Keep a mud puddle damp in a sunny location, or fill a bucket with sand and enough water to make the sand moist.
  • Do not use pesticides in your garden. 
  • Butterflies use two different types of plants, those that provide nectar for the adults to eat (nectar plants: Aster, Shasta Daisies, Hollyhock, Echinacea, etc.) and those that provide food for their offspring (host plants: Digitalis, Lonicera, Parsley, etc.).

Check out the North American Butterfly Association for more information on creating a butterfly garden.
0 Comments

Bloom of the Week: Canadian Shield Roses

5/15/2017

5 Comments

 
Picture
Did you know? Have you heard? This year is the 150th anniversary of Canada becoming a country. I have to admit, that is pretty exciting. That is 150 years poutine, 150 years of hockey, 150 years of the true North strong and free, that's 150 years of everything that makes us Canadian. Can you tell I'm proud to be a Canadian?!?

To go with this event, the people at Vineyard decided to create a Rose that would help every garden join in the celebration and we have them in stock for you! Introducing the Canadian Shield Rose:
Rose, Canadian Shield
Canadian Shield is a versatile garden and landscape Rose with a 3 ft. height and width, and full, silky-textured red flowers and glossy green foliage. It’s a repeat bloomer, resistant to blackspot and winter hardy from coast to coast. Hence the name Canadian Shield!

​You can trust in its hardiness as this beauty was started right next door in Morden, MB as a federal breeding program to create rose varieties that could cope with our extreme Canadian temperatures. 
Vineyland Research Station (located in Ontario) took over the program and helped finish bringing this Rose to market.
When you bring your Canadian Shield Roses home, plant them in a place that gets at least six hours of direct sun daily and well-drained soil of any type. For best results in poorly drained clay soils, make a raised planting area. Spread 2-4 in. of compost or peat over the area to be planted and mix it in well. Dig a hole twice as wide and approximately 8 in. deeper than the container.
​
Roses should be watered regularly through the summer, every few days if there is no rain. They should be watered in the morning at ground level and not overhead. You want to avoid wetting the leaves as this promotes disease.

​Work in some slow release fertilizer around each Rose bush as soon as the winter protection is removed in spring. Fertilize again after the first flush of bloom early in July, and once more in early August. Do not fertilize after mid-August as this allows the Roses to harden off properly before winter.
Picture
The only reason to prune back a hardy Rose is that it has grown extremely tall (over 3 ft.). In this case, it should have their branches cut back to 3 ft. in the fall to prevent ice damage. 

Canadian Shield Roses are such a unique way to commemorate Canada's sesquicentennial. That's right, I said sesquicentennial... Well maybe I just typed it! So pop by the greenhouse and have a look at these brilliant, red blooms for yourself. Add a little patriotism to your garden this summer!
Follow my blog with Bloglovin
5 Comments

Bloom of the Week: Dracula Celosia

5/2/2017

5 Comments

 
Picture
Celosia, Dracula
Let's just get it out in the open, right from the beginning... I'm not a big fan of Celosia. There I said it. This has to be one of the most unique looking "flowers" out there. I did put the quotation marks around the word flower on purpose. This "flower" doesn't have petals, depending on the variety, it will have spires or cockscombs.

Celosia flowers, with their unusual blooms, can "flower" up to 10 weeks. When many of these "flowers" are next to each other, they collectively resemble fire, which is why the name Celosia, meaning burning in Greek, was chosen.

Perhaps I'm a traditionalist, I expect my flowers to have petals. But then, Dracula Celosia arrived in the greenhouse. I have to admit, the name alone intrigued me enough to take a closer look and I'm glad I did! I may be a Celosia convert. Perhaps my flowers don't need to have petals, perhaps they can have spires, perhaps I would like a cockscomb in my garden!

Dracula, a novelty Celosia, is new for 2017. It is the first of its kind, with one large 6-7 in. "flower" on top of each plant. In the greenhouse, the combs are red and the foliage is green with some red, but once you take this lovely beauty home and plant it in your own garden, the foliage will get darker and change to purple tones. The come will also start to change to a darker purple colour. With its unusual shape and eye-catching colour, Dracula Celosia will add drama to your landscapes, gardens and containers.

Picture
To grow your Dracula Celosia, make sure to plant in full sun. They need rich soil with lots of compost to produce their big, dramatic plumes ('cause you know I can't call them blooms or petals!). Make sure the soil is moist, but not wet and that it drains well. Water them regularly during the dry periods. Add a general purpose fertilizer one or twice a month. To produce more plumes, pinch back the first one. This may make you nervous for those first bright cockscombs, but have faith! This will promote more branching and reward you later.

Create a little excitement with this show-stopper, pair with an African Marigold such as Lady Orange or a Snapdragon; the Merlot Mix from the Snapshot series would be lovely with the Dracula Celosia. So why not take a chance this spring and try something new and different? ​​

5 Comments

Bloom of the Week: Red Prince Weigela

7/1/2015

0 Comments

 
Picture
Picture
Red Prince Weigela are highly prized for their dark pink to red flowers. These blooms are out from late spring all through summer and appear in clusters against a backdrop of dense, medium-green foliage. The blooms attract hummingbirds like magnets! 

Weigela is a tough and easy deciduous flowering shrub. For best flowering and growth, provide these shrubs with full to partial sun and average to fertile soil with good drainage. They look super in mixed borders or as hedges. Prune them back to strong new side shoots in summer after they bloom. Shearing them destroys their natural arching habit.

When planting the Red Prince weigela, there are a few things to keep in mind:
  • First, clean up the planting site. Remove any rocks, leaves, twigs, weeds and other debris. Spread a 2 in. deep layer of compost over the ground with a rake. Mix the compost into the top 10 to 12 inches of soil, this probably best done with a rototiller, but you can also do it with a garden fork.
  • Next, dig a hole twice as wide as and equal in depth to your Red Price weigela's root ball. Keep in mind it's probably best to space the shrubs 6 ft. away from everything (other plants, buildings, etc.).
  • Remove the weigela from its container or root ball wrappings and cut off any dead, brown to black, broken or mushy roots with a pair of pruning shears. Cut through roots growing in circles around the root ball.
  • Place the weigela in the center of the planting hole. Fill the hole halfway with soil, tamping it down firmly around the root ball. Fill the hole entirely with water from a garden hose. Allow the water to drain down through the soil. Fill the hole with additional soil, tamping it down around the roots. Do not overfill the hole or bury the weigela deeper than it was previously growing.
  • Build up a 4 in. mound of soil around the weigela, 18-24 in. away from the main stem. Fill the resulting reservoir with water. Wait for the water to drain down through the soil. Sprinkle additional soil onto any depressions created by the draining water. Do not tamp the extra soil down, because doing so would overly compact the wet soil.
  • Spread a 2 in. deep layer of bark mulch over the planting site. Keep the mulch 4-6 in. away from the weigela's main stem to prevent it from rotting.
  • Water the weigela when the top 1-2 in. of soil become dry. Do not allow the soil to dry out completely or become soggy. If possible, maintain this watering schedule during the first year of growth.

0 Comments

Wood You Like to Ash a Question?

6/17/2015

1 Comment

 
Picture
I'm probably the only one who finds the title of today's blog post about using wood ash in the garden funny, but hey, life is short so I thought I'd take a chance! Some say I have a great sense of humour, but well... it's only some :-)

So, anyways, onto today's topic: wood ash. If your like us, on summer nights (spring and fall too if the weather co-operates) we love to have people over for a backyard campfire. Enough so, that the ash from the wood we've burnt has piled up and needs to removed to somewhere before the next fire. So, where to move it to???
Wood You Like to Ash a Question?
Well, as it turns out, you can use that ash in the garden! But before you go ahead and dump vast quantities of ash into your soil, there are a few things you should know:

Wood ash can be a great addition to the garden, mind you, it does have to be pure wood ash. No bits of garbage, cardboard or pressure treated, painted or stained wood. This ash contains most of the 13 essential nutrients the soil must supply for plant growth, including calcium, potassium and magnesium.

Root vegetables such as carrots, parsnips, turnips, peas and beans will do great with a little bit of added ash, some fruits as well such as raspberries, blackberries and strawberries. Underwater plants can also be strengthened by using 1 spoonful per 1000L of water.

0.5 - 1 lb. per year is actually recommend for shrubs and rose bushes. It's best to spread the ash evenly on the soil around the plants and rake it in lightly, being careful not to damage the roots. Never leave ash in lumps or piles as the concentrated salt leaves will leach into the soil creating a harmful environment for the plants.

Another benefit is that wood ash can be used to help repel insects, slugs and snails. However, once the ash gets wet, the wonderful repelling effect it has vanishes.

However, this being said, being alkaline, wood ash obviously isn’t an ideal addition if your soil already has a pH of 7.0 or greater. Regardless of your pH, it shouldn't be added around acid-loving plants such as blueberries or potatoes either as it can encourage the growth of "potato scab" which is a fungus. Newly germinated seedlings are another thing to stay away from as the ash contains too many salts for them.

So ash I see it (I did it again), using wood ash in the garden has many natural benefits. So I say - go ahead - have those backyard campfires! Roast some marshmallows! You'll only be helping your vegetables if you do :-)

1 Comment

Bloom of the Week: Buckeye Belle Peony

6/3/2015

0 Comments

 
Picture
Picture
Buckeye Belle peonies are an early-flowering, ruby red peony. This semi-double has glossy outer petals that loosely follow the curving contours of a wide brandy glass. These enclose a ruffled taffeta middle of fimbriate red petals set among golden stamens. The foliage has an emerald green tint. When sunlight strikes, this peony is a jewel in the late-spring border. These peonies make excellent cut flowers.

Good Companions
Peonies mix well with roses because most share the same foliage tones of glossy copper-red. Although peonies flower for two weeks on average, their handsome foliage carries them through spring, summer and autumn. Also, they add structure and form to a border and can be planted with later-flowering annuals such as cosmos, or used with penstemons.


Growing Tips
  • Peonies are long-lived, resilient plants for good soil and sunny positions. They do not enjoy waterlogged soil. Contrary to popular opinion they can be moved. However, if you do move them, it is best to do so in the fall.
  • The most common mistake is planting them too deeply. The tuberous roots should be planted 2 in. below the soil surface.
  • Containerised plants should be planted so the soil surface in the pot remains level with the ground. Stake in April to prevent blooms from flopping in wet weather. Large plants need sturdy semicircular metal hoops. Peonies like cold winters and generally flower better afterwards.
  • Peony wilt can be a problem. It tends to strike in wet summers and the wilted foliage should be removed and destroyed. Generally plants seem to recover the following year.
  • Cut down the foliage every autumn and tidy up the plant and to help prevent diseases.

0 Comments
<<Previous
Forward>>

    Author

    Hello! My name is Lee Ann and I am the daughter-in-law to the Giesbrechts. I have learnt much about gardening from helping out in the greenhouse, but I hope that through writing this blog, I will learn more and be able to share the things I have learnt with you!

    Archives

    June 2018
    May 2018
    April 2018
    May 2017
    July 2015
    June 2015
    May 2015
    April 2015
    May 2014
    April 2014

    Categories

    All
    Bloom Of The Week
    Garden Pests
    Tips & Such

    RSS Feed

    Follow

Shopping

Our Plants
Our Goods

Company

Contact Us

hours

*Closed for the Season
© COPYRIGHT 2015. ALL RIGHTS RESERVED.